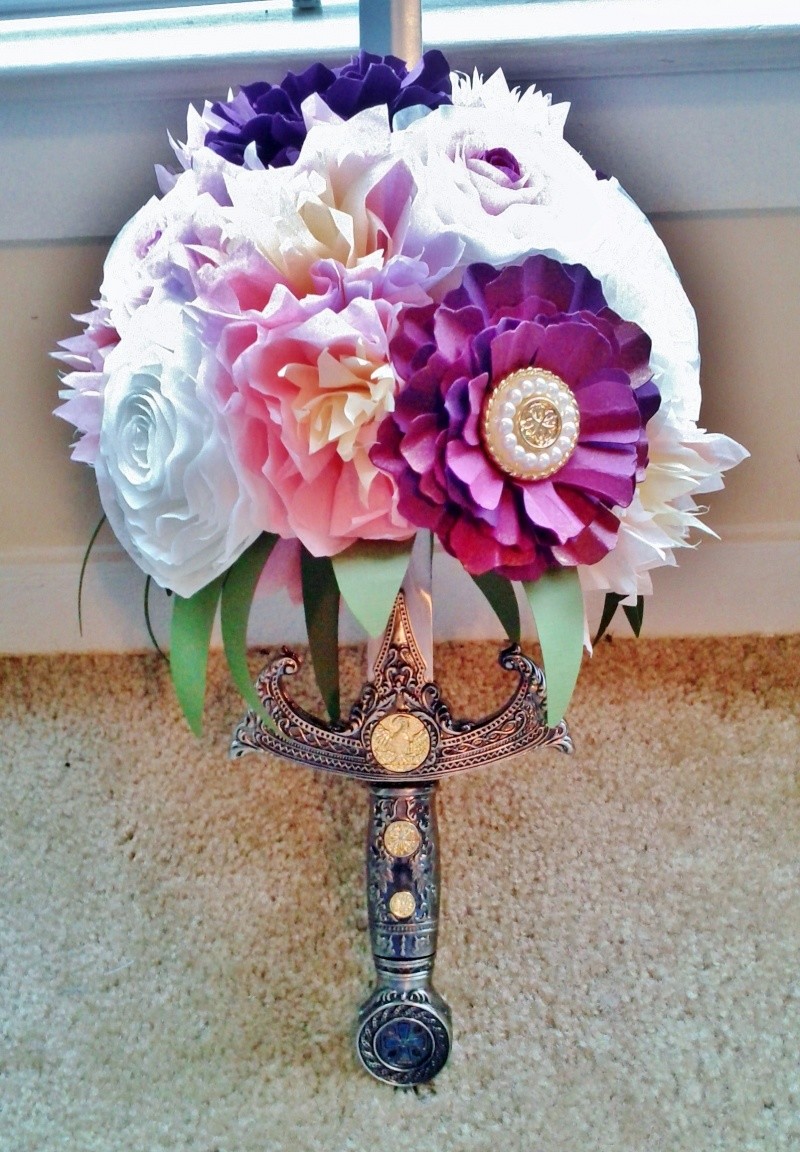
I already showed you my coffee filter tutorial, and I also just finished another sword bouquet! In it, I used the coffee filter flowers, and ones made of poster board and buttons.
I based my flowers off of this tutorial, but, that tutorial requires tools that I don't have — a special machine that cut out the flowers, and that's awesome. But, if you don't have that machine, it can be done by hand!
Here's how I made mine…
What you'll need
- Poster board or pretty, thick paper such as card stock or scrap-book paper. The down side to the poster board is that it is thick, and I can only cut out one flower at a time. With scrap-book paper, I could cut out two or three in one go.
- Scissors to cut paper
- A hot glue gun and glue
- A button, brad, or whatever you want to put in the center of your flower
- Wire of your choosing
- I did a wash of paint over some of my flowers, so if you want to vary your flower colors, this is recommended.
To make the paper flower:

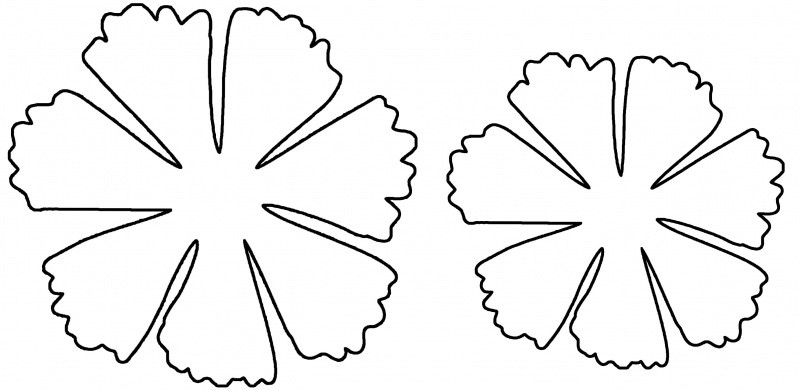
Here's the pattern I used. The bigger flower is about four inches in diameter and the smaller one is about three. You'll need three of each size for one flower.
 For one whole flower, we'll need three big flowers and three small ones. Trace around your pattern and cut them out. Warning, this takes FOREVER.
 After I cut them out, I did a wash of a darker purple paint over one big and one small, a dusting of gold over one big and one small, and a dusting of pearl pink over one big and one small. Each coloring was very subtle, but I find it helps each flower stand out more. Because my poster board is so thick, painting them and getting them damp helps when you're pinching them.
 Now, take a flower and fold a petal in half. Just the petal, not the entire flower, as pictured.
 Then, fold each side, as shown, so you made a W or an M shape (depends on how you fold it, but the shape doesn't matter).
 Repeat the folds on each petal, of each flower. This also takes forever
 When you're done, you can gently flatten out the petals to your desired flatness, but remember that the folds give it texture, so play around with how flat or 3D you want it.
 When folding the smaller sized flower petals, sometime it is hard to get it to look like a W or an M. So, you can just do two folds so it looks like a Z.
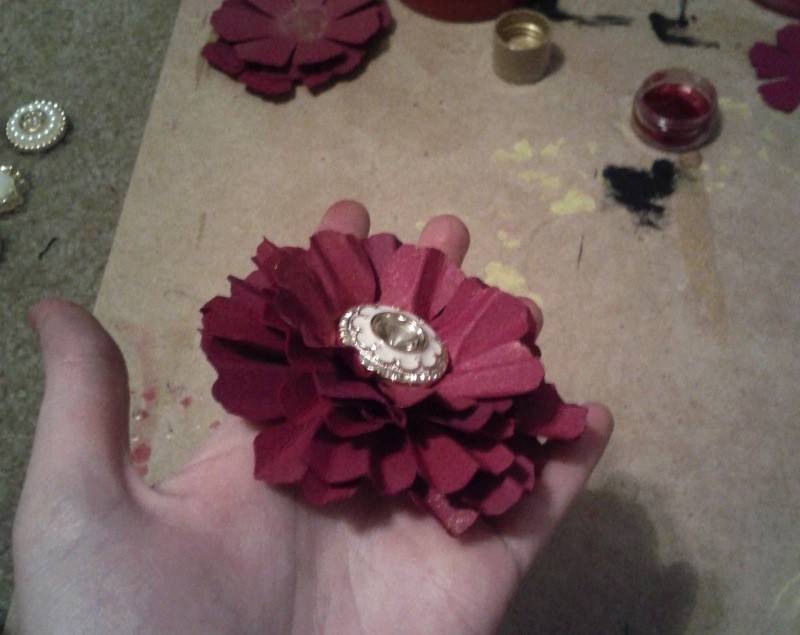
 You can see the variations in flower colors, some are more purpler than others. What you can't see is the gold and pink pearl dust I put on some as well. It's very subtle, but in real life you can see it. I flattened the flowers out a bit.
 So, now we glue them all together! The three big flowers are on the bottom and the three smaller ones are on the top. If you painted your flowers, stack them on each other to see what color combinations you like best before gluing. When you're ready, just put a drop of hot glue in the center of your flower and push the center of your next flower on to it. Try to line up the edges on the outside so it is center, and make sure the petals are misaligned from one another so they overlap and don't block one another.
 Once you glue the three big flowers together, glue on the smaller three just as you did with the bigger ones. Then, glue a button or whatever you chose in the center.
To make the flower stems:
 Now we're going to add a wire to the back. Start by cutting a circle about the size of a silver dollar out of paper. Since we won't see the back, I used a pink card stock, so as not to waste the actual purple poster board
 Fold in half and make a small cut in the center along the fold.
 Get your wire and cut about 6-8 inches off, or how ever long you will need for your project. Then, bend it into an L about 2-3 inches in.
 Curl your shorter end into a wide spiral.
 Stick the wire through the paper circle and the cut we made.
 Put some hot glue onto the wire and paper, and glue it to the back of your flower.


 I like them, and they are pretty, but be warned, these take forever to make. You wouldn't think that it would take you very long to cut out six flower shapes and pinch each petal, but you would be so very wrong. One flower takes me about 20-30 minutes if I'm lucky.


Love the sword bouquet idea. What a great project!
I like this idea a lot! I’m organizing a shower and am going to use the paper flowers from this tutorial. I don’t have a sword handy, though I wish I did!
They look like a real flowers, very natural and cute!
Thank you for a great idea and detailed instruction!))
Those look amazing, and I love the level of detailed instruction! One question though – are all of the flowers in that bouquet made from paper? If so, I would love to know how you made the ones that look more like roses – like that pink-and-white ombre one right above the finished purple flower in the last pic of the bouquet! I still haven’t found a paper rose DIY that I really love but if those are paper they might be the winner!