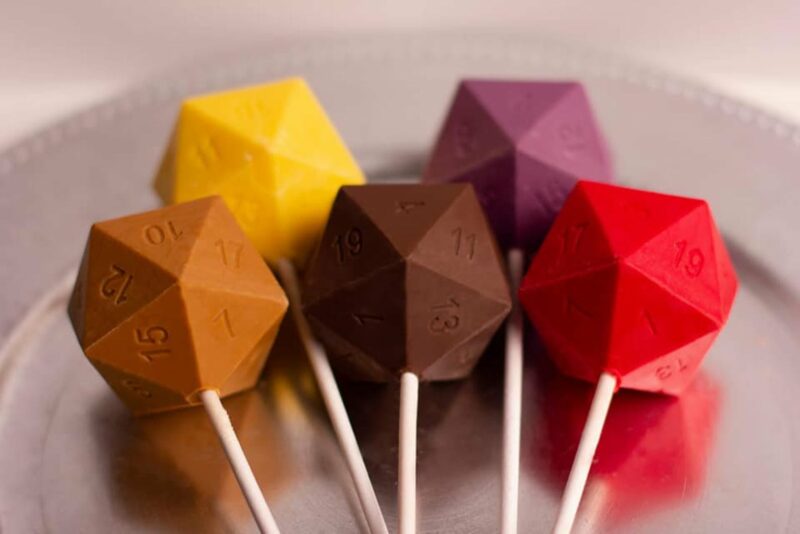
I've had several people request a tutorial for the Dungeons and Dragons dice mold that I created. So, here's my step-by-step tutorial for how to make this:
So that you can make these:
Before we begin, some disclaimers.
- First and foremost: This is about as complicated and expensive (net cost: $100 + shipping) a mold as you're likely to get, for anything reasonably sized. (Well, unless you want molded daleks complete with little plunger-arms or something else that is fundamentally not a convex shape.) That's because it has a lot of little, tiny, fiddly pieces, and it's a two-piece mold meant to create solid 3D shapes with no flat back. And the little fiddly pieces are of variable depth so you need way more silicone than you would if, say, you were just molding your favorite buttons. Chances are, your mold doesn't need to be this insane. But that's fine! You can still use this tutorial, just skip the pieces that are clearly irrelevant.
- Second: I learned how to do this from MakeYourOwnMolds.com. Not only do they sell all of the materials you need for food-safe custom molds, but they have excellent YouTube tutorials. If you decide to do a project like this, I do encourage you to go look around their site. That goes double if you're doing a one-piece mold of a single object; they have other products that are much easier to use than the liquid stuff for simple projects.
How do make your own D&D chocolate dice mold
Materials:
- 7 sets D&D dice
- 5 lbs two-part liquid molding silicone (NOT latex)
- 4-5 lbs food-safe modeling clay (you can get away with less, but I'm not that good)
- Food-safe wax (“Release-Dit” is the silly brand name)
- A handful of simple 3D objects to make the mold alignment slots/tabs. (I used the flat-bottomed oblong glass marbles we use for counters in board games.)
- Disposable containers for mixing the silicone in (large Chinese soup containers are great)
- Sturdy disposable stirrers for stirring the silicone
- A flat container at least as deep as a standard baking dish, large enough to hold all of your dice spread out; or, more modelling clay, parchment paper, and patience. (Note: you will be shoving modeling clay into said flat container. A smart person would probably not have put modelling clay directly into her good baking dish. Not being a smart person, I can tell you that it's a bitch to clean; you might want to use a disposable container if you can find one that's big enough. You definitely want something with smooth walls, though, because the silicone will ooze into everything.)
- A kitchen scale, or measuring cups you don't care about (improvised will do, as long as you can evaluate equal amounts of two liquids)
- A natural bristle paintbrush that you don't mind throwing away when you're done. (Two if you're making a very detailed two-part mold.)
We're going to be molding this in two halves, so that we can separate the halves, fill them, empty them, all that good stuff. However, silicone is thick stuff; we can't just stick the dice in a layer of it (which would be the easy approach), because they'll float rather than staying at the level we want. So instead, we're going to mold from the top down.
 Geeky wedding favors for every genre of geekdom
So far on my quest to help you find the perfect wedding favors I've profiled edible favors and rock 'n roll favors and in this... Read more
How to make your own Dungeons & Dragons chocolate dice mold PART ONE:
STEP ONE:
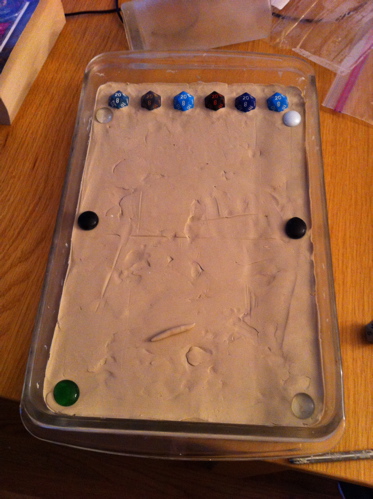
You'll want to put a layer of clay into your container that's deep enough to hold all of your dice to the level you want one-half of your mold to be. (For everything except d4s, that's “halfway.” For d4s, you're basically going to have the entire volume of the die in one half, and just enough depth to mold the numbers in the other half.)
Get the surface reasonably flat and smooth; this will become the model for your mold's dividing surface, and it'll be easier to clean if it's not rough.
STEP TWO:
Push your alignment markers into the clay, making sure that you have at least one per corner. (I ended up doing five, so that I couldn't accidentally rotate one half of the mold; in this picture, you see six because I wasn't yet sure how much of the clay base I'd need for the dice.)
STEP THREE:
Then, begin inserting your dice one by one to their dividing line. Make sure to leave at least a quarter inch of space between them at the narrowest spots; any less than that and the silicone may be too wobbly to get a good shape.
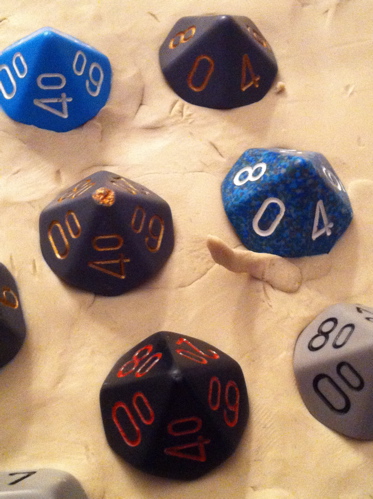
You will notice shortly — probably when you get to the d10s — that many dice do not actually have a simple horizontal dividing line between the “top” and “bottom” halves. Instead, they have a jagged edge where the faces meet. This is rather inconvenient, since silicone will creep under any exposed surfaces and create molds that have a little inward divot. We'll just have to live with some of that — after all, that's the shape we're trying to create — but we want to have as little of those fragile lips as possible. (Remember how I said that less than 1/4″ of silicone isn't reliably stable?) So when putting dice in, I found it helpful to use a little extra clay to fill in some of those hollows, just a little bit.
Remember, it's not the end of the world if the final mold surface isn't perfectly flat; we just want it smooth enough to easily scrape/scrub clean.
STEP FOUR:
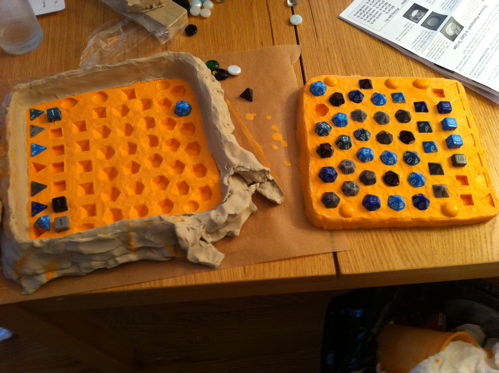
Once all the dice are inserted, you may discover that your container is too big for your dice after all. If so, build yourself a little clay wall, like so:
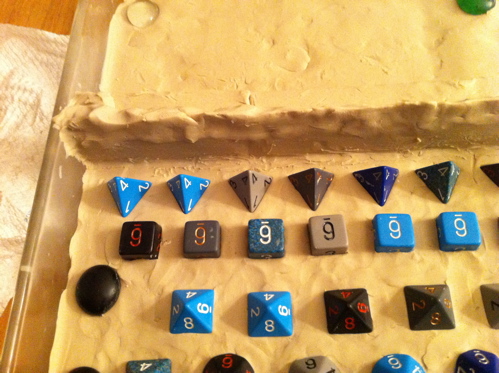
This will make sure you only use the silicone you need, and don't waste it by filling unnecessary space. Note how the clay there is actually rubbed up to meet the wall of the dish: the silicone is liquid, and *will* get into cracks if you leave any. And then your mold will have little stringy bits, and you'll have to cut them off, and that will just be annoying. So be sure to smooth your edges together.
So you should now have a final “master,” that looks something like this:
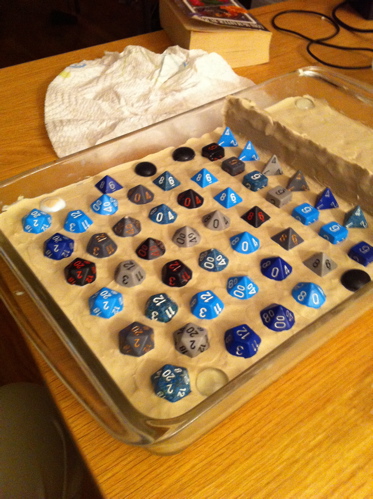
(As an aside: Note how mine is crooked and tilts slowly up as it goes left? Yeah, the final mold ended up lopsided too. It's usable, but annoying. Don't do that. Silly me didn't think to look from the side when deciding whether the clay was flat.)
PS: If this seems like wayyyy too much trouble, you can always just buy one of these.
STEP FIVE:
Next, we're going to mix the silicone. With the stuff I used, it's a 50-50 mixture. I did an initial volume estimate in water, divided that in two, and used that to measure the amount of silicone I'd need.
Do not use your good measuring cups for this step! I used my good measuring cups for this, figuring that stainless steel would be easy to clean. Unmixed silicone is sticky. Very sticky. Also not water-soluble, and soap is only of limited use. Don't make my mistake; you'll regret it for the next three weeks of scrubbing. Use, say, smaller Chinese soup containers instead. Or use a kitchen scale to get 50-50 weight ratios; it'll be more accurate anyway.
Also note that when combining silicone, it is really important to get it well-mixed. If you think it is well-mixed, it's not; scrape out the bottom and sides some more. This stuff is thick and sticky.
STEP SIX:
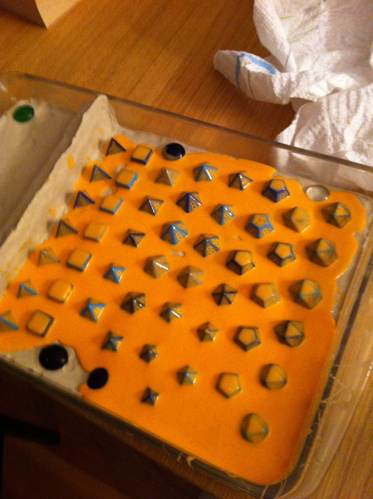
You'll want to mix an initial small batch, using a subset of your final volume. This will be used to brush into the cracks and fine details in your master: in this case, to highlight all the numbers on the dice. You'll also want to use it to get a thin coat of silicone around the final surface of the mold: all of the major edges, the top, etc. This is to prevent annoyingly-located bubbles from causing problems with the final casting. (It isn't critical that you get to the edges of the dish; after all, that's just aesthetic.)
STEP SEVEN:
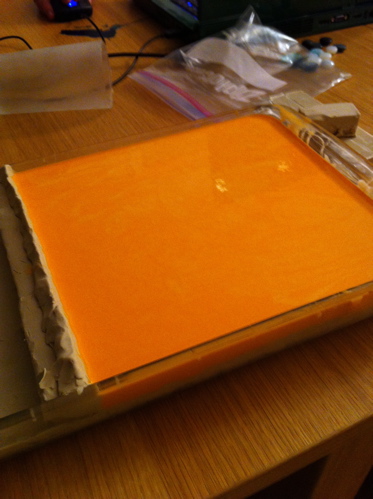
Next, mix the rest of the silicone for this half, and pour it in, as far from the critical components as you can without splashing. Make sure to fill to a depth of at least 1/4″ beyond your tallest object; make a note on the side of the container before pouring if you need to. You'll end up with something that looks (with my silicone, anyway) disturbingly like a casserole dish full of Velveeta.
STEP EIGHT:
Let it sit for at least four hours, or whatever it says with the instructions for your silicone. Overnight works great. When it's done, it should be solid, not even a little bit sticky, and if you press it with something thin like a coin, it'll just spring immediately back into shape without leaving even a temporary dent. In other words, it'll look and feel like solid silicone. Remove it from your container; don't worry about prying a bit, it's tough. Peel off any clay that's stuck to it, and voila:
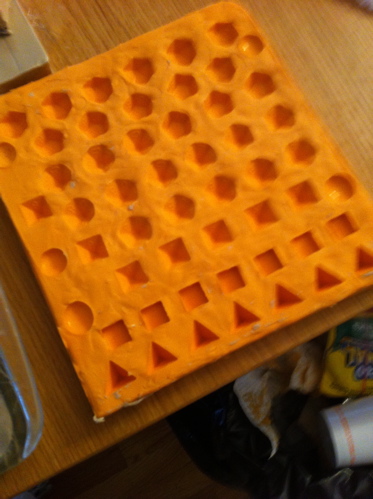
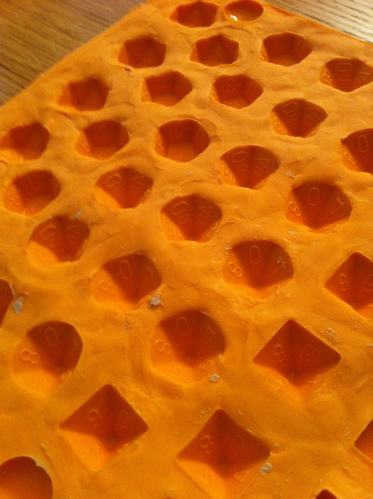
You've got half of your mold! If you want something with flat bottoms — say, you want to decorate your cake with half-dice, or whatever — you can stop now. Otherwise, on to Part Two!
How to make your own Dungeons & Dragons chocolate dice mold PART TWO:
STEP ONE:
First, liberally coat your shiny new mold with your Release-Dit or other handy-dandy wax. Wipe off the excess; you just need enough that the next batch of silicone won't stick to itself, not so much that you get lumps where the wax was. And then go through and put all of those dice back into the mold, being sure to align the numbers correctly. (You may need to rub them down in paper towels to clean the excess clay off; remember, you want those numbers clear!) Do NOT put your alignment components back in: the whole idea is that you'll have a raised piece of silicone in the other half of the mold that you can slot in when you're creating your real objects.
STEP TWO:
Put the mold back into the container, once you've removed the clay; or, if the container didn't have straight sides so your mold won't fit, or if you forgot to put plastic wrap at the bottom of the container so you get fed up trying to get the clay back out (oops), put the mold on a piece of parchment paper big enough to protect your table from leaks and splashes, and use that extra clay to build a wall around it on all four sides, remembering to smooth the clay to prevent leaks. (Sorry, didn't get a work-in-progress photo of this one.)
STEP THREE:
Use the same technique as before to mix a little silicone and cover the surfaces and details, then a large batch to fill in. Let set, and voila:

STEP FOUR:
Remove the dice, clean off clay and wax with a quick scrub in the sink (non-scratching sponges only!), and you're ready to go. You may see a few flimsy little raised edges in the new half, from where silicone leaked under dice without the clay barrier; you can use an X-acto knife or small sharp scissors to cut those off, but small firmly attached ones won't do you any harm.
And there you have it: one 3D mold for D&D chocolate dice.


