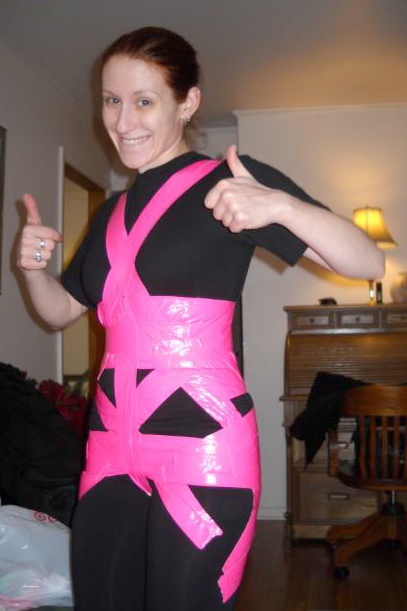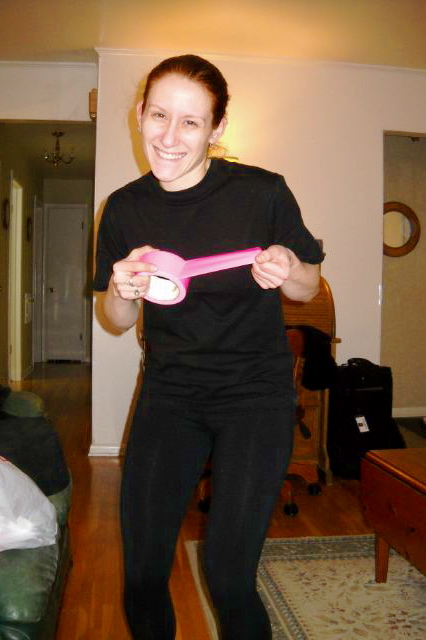
During a recent discussion on Offbeat Bride, one of the commenters suggested that I post a DIY tutorial for the Duct Tape dress form that I am using to sew my DIY wedding gown.
Fortunately, I had many goofy pictures of me looking completely unattractive during that process, so I am able to do it!
What you will need for your DIY dress form:
- 2-5 rolls of duct tape, depending on your size
- an old t-shirt (short or long sleeves) that isn't too tight or too loose on you
- a pair of old shorts or pants, again, not too tight or loose
- scissors
- a sturdy hanger (I prefer ones like this) – make sure it is able to hold a fair amount of weight without breaking (metal or metal/wood ones seem to work best)
- old phone books, junk mail, fabric scraps, newspaper, etc.
- a friend or family member whom you trust!
Assemble these supplies in one conveniently accessible area. I recommend having at least a 6×6 ft working space where you can stand in the middle, as well as a small table and something to hold onto (couch, wall, etc.) nearby.
STEP ONE

You need to prepare yourself and your clothing for taping.
- Put on an old shirt and shorts/pants, and check the waistband of the bottoms.
- If the bottoms squeeze your side from the elastic, cut the elastic through until the they stay on your waist but you don't have any constriction from the elastic itself. I often cut three slits through the elastic (sides and back), or if the bottoms will stay on without the elastic, cut it off entirely.
- It is up to you if you want to wear a bra and underwear — I recommend it, but I wouldn't wear a favorite just in case.
- If you have longer hair, make sure it is completely off your shoulders/neck so it does not get stuck in the tape.
STEP TWO
Okay, now your trusted friend or family member comes in, as they will be doing the taping (and I will explain the “trusted” part later!). Give them the tape, and have them start to wrap you. Your job is to stand straight and still as this process is happening, and guide them for any areas that don't feel tight enough or are preventing you from breathing.

I usually have them start by making an “X” that goes from one shoulder, below the opposite breast to the hip. It is easiest to have them work from the center of a really long piece of tape, putting the center on your shoulder and then wrapping the rest to the hip on each side.
STEP THREE
You then do the exciting/awkward part… Once the X is formed, use it as a foundation to create the crotch of your dress form. I have my helper start from the center of the X (doesn't matter if they go from front or back to start), stick the tape down to the X, and then unroll the tape as they go between my legs to the center of the X on the opposite side. You will need to repeat this part a few times, fanning the tape out from your starting point on the X to each side, until the crotch area is basically covered. Don't worry about small gaps in the strips of tape.
STEP FOUR
Once that part is done, you have enough stability to start creating a waist. Start with the natural waist, and have your helper wrap around it, always starting at a point where you can stick tape to tape. Slowly build layers, making sure to have it be tight enough that it reflects your actual size, but not so tight that you can't breathe or are feeling really constricted. Do the same thing for the hips, again, starting by sticking tape to tape each time. It is often easiest to work in sections of tape that are about two to three feet long, instead of trying to spiral the tape around.
STEP FIVE
From this point, you begin to have your helper fill in gaps around your body. Have them try to focus on following the curves of your body in shorter pieces of tape, making sure that the ends are always sticking to a previously taped area. Have them fill in any missed spots and aim for overall smoothness.
Figure out how far down your legs you want the form to go, and get those taped as well. Do not tape the breast area or shoulders yet.
Note: If you are making a sheath, mermaid, or other form-fitting dress, you may not want to add legs. If you do not want to use them, just stand at this point with your legs together and have your helper tape them together.
STEP SIX

Determine now how you want your arms positioned because the next step is wrapping the shoulders.
I do mine just a little out from the sides so that I can fit sleeves around them easily.
You want to start wrapping the arms by getting tape from the armpit to the neck on each side — try not to move your arms during this part.
Then, figure out how long you want the arms to be, and wrap a piece of tape around that point.
Next, your helper needs to connect that “end point” of the arm to the shoulder/neck area.
Have them wrap on diagonal lines from the shoulder/neck down to the end of the arm…
Otherwise, the sleeve you are taping over may slip as they work.
Wrap several horizontal pieces of tape around this to cover any open patches and add stability.
Have them use small pieces of tape following the contour of your shoulder, always attaching to other tape.
STEP SEVEN

The same process for the shoulders (working with small pieces of tape stuck to other tape following the contours) is how you sculpt the breasts on the form.
This is one area where you do not want your helper to pull the tape too tight as they add it, since it will squish and give very oddly-shaped breasts to your dress form!
Have them work from the outside of the breast to the nipple area, going around in a circle and overlapping the tape (think “spokes on a bicycle”).
Once each breast is covered, they can then add smaller pieces of tape around it and over the top to smooth things out and perfect the shape as needed.
You are now fully encased in your dress form!
You remember how I said “trusted friend or family member?” Here is where you understand the importance of this:
- You are immobilized pretty much completely, minus your now waving-around-feel-like-a-T-Rex arms.
If you happen to be pushed over (say, by your charming maid-of-honor who is your sister), you cannot save yourself. AT ALL. - They now are going to be cutting this thing off of you.
STEP EIGHT
Have your trusted helper start at the neck of the form with the scissors to cut it off. I have my helper do this on the back of the form, but it doesn't matter one way or another.
Have them carefully cut through both the shirt and duct tape, lifting the point of the scissors away from your body as they do this. Continue until the base of the back or below your belly button on the front.
Once at this point, I have found it is easiest to curve the line down one leg or the other until you have completely cut through to the bottom of the form on one side.
If you are wearing a bra or underwear, have them feel for them as they get to those areas to avoid cutting through them if you care.
STEP NINE

You will have more mobility now to remove the dress form.
If you curve your back (think like you are trying to squeeze your shoulders together in front of you), you can wiggle out of the arms pretty easily (though if you do one with full arms, you will need to have your trusted helper cut down each arm as well).
Carefully step out of the dress form, trying not to change its shape as much as possible (don't fold it or crumple it).
STEP TEN
Now comes the fun part: stuffing! I like to start at the bottom and work my way up.
Tape the leg that was cut back together, using short pieces of tape laid perpendicular to the line where it was cut — being very careful to line up the edges precisely.
Add some stuffing of choice (phone book pages, newspaper, junk mail, etc.) and wad them up before putting them in. Once you have a little mass in the legs and the shape is stable, use duct tape to finish off the ends of the legs.
You want to put plenty of stuffing in the form, or it will get out of shape as you use it later. Try to get it as firm as possible.
(Note: if you feel like a part of your form is collapsing later after you have been using your dress form for a while, you can open it back up with a sharp knife, add more stuffing, and tape over it again.)
Continue doing this through the body of the form: tape up the area that was cut carefully, and then stuff it.
If you are going to add a hanger to the form, you will want to stop when you get to approximately the area of your shoulder blades/bra strap on the form.
STEP ELEVEN
To add the hanger: Put your hanger inside the dress form, and situate it so that the top is coming out of the center of the neck. If you are using a wire hanger, I suggest padding it first along the edges that will sit in the neck/shoulder area of your dress, before putting it in.
You can then add stuffing around the hanger through the back, getting it as tight as you can as you work your way up, closing the areas on the dress form that you cut as you work. Leave the neck open for now and proceed with the rest of the directions.
Finish stuffing as much of the torso as you can on the dress form until you have closed the cut line entirely and the form feels firm.

STEP TWELVE
To close the neck (with or without a hanger), lay strips of duct tape from the edges of the neck hole across the form.
(If you are using a hanger, meet them in the center so that the top of the hanger makes a hook in your dress form).
The arms are doing much the same as the legs: stuff from the bottom of the arm hole up into the form, and once it is filled out and stuffed firmly, use duct tape to close off the ends.
If the neck area feels insufficiently stuffed, continue using the armhole as a method for getting more stuffing to the neck area of the form.
I often use a chopstick, wooden spoon handle or similar to poke the stuffing through to that area.
You can now use your dress form to make many exciting outfits for yourself!
Hope you enjoy, and if anyone has questions, leave 'em in the comments…
PS: if this feels too hard, you can always just buy one like this!


